 EcoSmart Stud
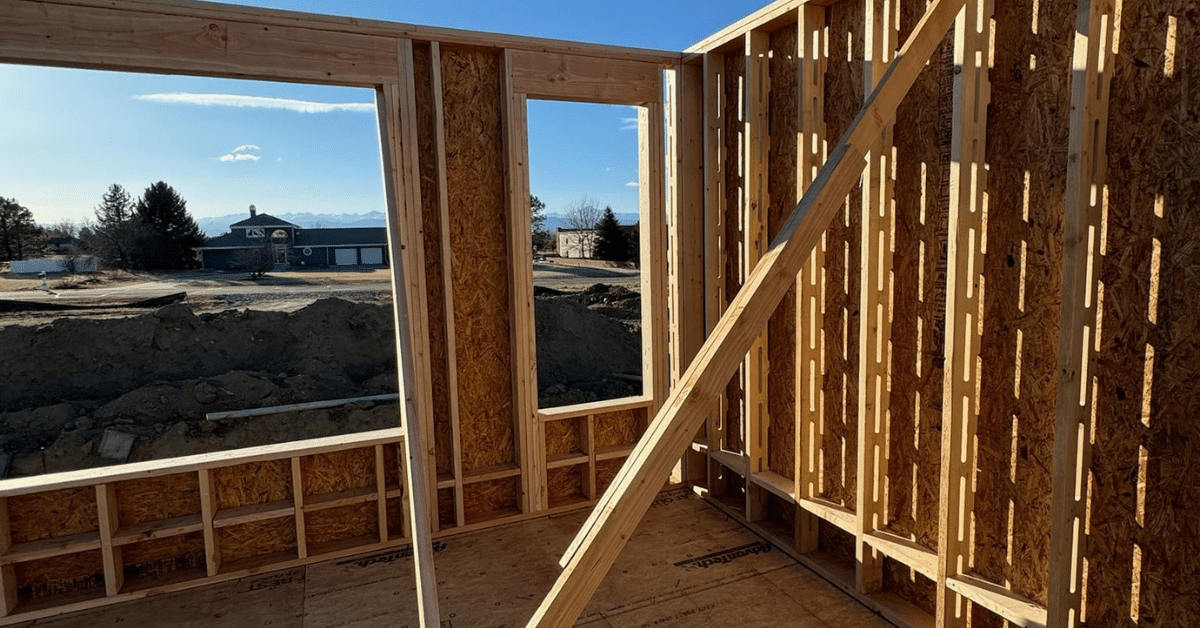
Why Wall Studs Matter
Wall studs are the structural part or load bearing element of a Light Framed exterior wall. This is the most popular way to build a house in the United States, Canada, parts of Europe and Australia. Homes built with Light Framing construction can last for hundreds of years.
Over the past 50 years one of the major changes to Light Framing construction was the move to 2×6 wall studs vs 2×4 wall studs in cold climates. The purpose of the change was only for wall insulation. The thicker wall is more energy efficient. Now we need those Light Framed exterior walls to be even more energy efficient and that’s where the EcoSmart Stud comes in. It’s the 21st century update to the tried and true solid wall stud.
What Are Wall Studs?
Wall studs are vertical framing members that form the backbone of a wall structure. They provide support for the wall, hold up the floor and roof above, and create cavities for insulation, plumbing, and electrical systems.
Types of Wall Studs:
- Wood Studs
- Metal Studs
- Composite Studs
In any structure, wall studs must be strong, properly spaced to support both vertical and lateral loads.
How Far Apart Are Wall Studs?
In standard construction, light Framing wall studs are typically spaced 12 inches to 24 inches apart. The most common spacing for walls is 16 inches on center. All “on center” means is it’s 16 inches from the center of one stud to the center of the next stud.
The proper wall stud spacing depends on factors like Vertical loading and local shear requirements. In areas with high wind or seismic activity, tighter stud spacing or stronger materials are often required to meet stricter wall shear ratings and ensure the building holds together under stress.
For energy efficiency 24” on center spacing is commonly used in advanced framing and is the best option, but that may not be able to use due local building requirements.
This is where the EcoSmart Stud changes the game with our composite wall system. EcoSmart™ Studs are engineered to work seamlessly at both 16″ and 24″ OC for improved flexibility and energy efficiency.
How to Lay Out Studs for a Wall
Laying out a wall can get complicated. This is why panelized construction has gotten more popular in the last 20 years. The wall sections are preassembled and numbered where they belong in the layout of the building.
Step-by-Step Guide to Wall Stud Layout
1. Lay Out Top and Bottom Plates
Start by placing the top and bottom plates side-by-side on a flat surface.
2. Mark Stud Locations
Using your building plans, mark out where each vertical wall stud will go with a pencil and a framer’s square.
- Mark the corner stud first.
- Then measure and mark the rest of the studs from that point.
- It’s best to mark either the top or bottom plate first, and then use a framer or rafter square to transfer those marks onto the opposite plate.
3. Account for Openings (Windows & Doors)
For exterior wall framing, check the plans to identify where windows and doors are located.
- These areas will require extra studs for headers and proper support.
- King studs should be marked on both the top and bottom plates.
- Jack studs are typically marked only on the bottom plate.
- Cripple studs are also usually marked on the bottom plate, but always check the plans to confirm if cripple studs are needed above the header as well.
4. Plan for Interior Wall Intersections
When an interior wall intersects with an exterior wall, an extra stud or two will be needed at the joint.
- Use your plans to identify these intersections.
- Decide on the type of intersection framing you’ll use to ensure structural support.
- Standard (insulation must be placed ahead of time)
- Advanced Framing (ladder style)
- Advanced Framing (L style)
- Advanced Framing (Clips)
5. Place Your Studs
Once all the marks are made. Separate the bottom and top plates and start laying your precut studs in place.
How to Construct a Stud Wall
Once the wall is laid out it’s time to assemble.
Tools & Materials Checklist:
- Hammer and/or nail gun, framing version not a finish gun.
- Air compressor and hose or fuel cells to match a gas powered nail gun, gun oil.
- 16d framing nails box (loose) and/or strip nails to match framing nail gun. Make sure to get the matching nails, there are differences between manufacturers for nail guns.
- Nail puller, cats paw, wonder bar, tape measure, carpenters pencil, framing or rafter square (large & small)
- Tool belt, power saw (battery powered or corded), charger if using battery powered saws
- Safety glasses, work gloves (optional).
- Screw driver (flat and phillips)
Key Tips:
Framing exterior walls and interior are basically the same.
- Make sure to put at least 2 nails in each stud. 2×6 and 2×8 walls use 3 nails to nail the plate to the stud.
- Most interior walls won’t have windows but will have doors. Make sure on either type of wall know where extra reinforcements need to be added for different articles attached to the wall.
- Exterior wall sheathing is attached after the wall is framed and before tipping into position in most cases.
- Temporary wall bracing will be needed in most cases as assembly starts for both interior and exterior walls.
- Interior walls normally will not have any sheathing attached during framing, only exterior walls.
- For exterior walls run a bead of construction adhesive between the bottom plate and the floor, this is to seal against air infiltration. The same for a double top plate.
- When nailing walls to the floor shoot the nails at an angle.
Safety tips:
Always wear safety glasses, you never know when a nail will go flying.
Pay attention when using nail guns, make sure to keep hands and feet away from the back side of a board that the nail may penetrate through. Nail guns can bounce or double shoot, pay attention.
Wall sections can be heavy even when EcoSmart Studs are used and act like a sail when tipped up for placement. If not using EcoSmart Studs that have a built in grab handle get a framing strap to help hold onto the wall sections for moving and placing.
When wall sections are tipped into place make sure no one is on the other side of the wall section in case it keeps going and tips over.
Exterior Wall Framing: What You Need to Know
Exterior wall framing has a couple of extra items to keep track of.
Frame energy corners (inside and outside) properly glue down the bottom plate and the double top plate for better air infiltration sealing.
When installing multiple studs right next to each other, run a bead of glue between the entire length of the stud where they come together. This is for air infiltration sealing.
King and Jack studs at each window and door to support headers. Know how the double top plate overlaps at the corners. Also make sure to leave gaps in the double top plate for the interior wall plate to lock into the exterior wall plate.
Plan for extra framing for electrical boxes or other protrusions through the exterior wall.
Interior Wall Framing: What You Need to Know
Interior wall framing is much more straightforward than exterior wall framing. Check plans for locations where cabinets or fixtures will be mounted. These areas may need extra wood added to the area to make it easier to install cabinets. Review for any equipment that may require additional support or cutouts in the wall
Common Mistakes to Avoid
When learning how to lay out studs for a wall, it’s just as important to understand what not to do. These common mistakes can lead to structural issues, wasted materials, and failed inspections. Here’s what to watch for:
Here’s what to watch for:
1. Misplaced or Uneven Stud Spacing
- Incorrect spacing between studs can throw off your whole wall.
- Know where your 4-foot marks fall. This should align with standard 4×8 sheathing panels.
- Double-check your layout whether you’re installing sheathing vertically or horizontally.
- Make sure panels are staggered properly to line up studs and sheathing seams.
- Check for the crown in the studs. Put the crown to the outside of the wall
2. Forgetting Header Supports Over Openings
- Any opening for windows or doors needs proper header support.
- All headers require a jack stud and a king stud.
- For larger openings or higher load-bearing areas, use double or triple jack studs as needed.
3. Ignoring Local Building Codes
Building codes vary by city, county, and state.
Never assume and always check the local code requirements for stud spacing, fasteners, materials, and layout practices.
4. Using the Wrong Fasteners or Materials
Always use the correct fasteners and materials required for structural framing.
- Nail type and size must match local code and engineering specs.
- Mismatched or non-rated materials can cause safety and inspection issues.
5. Overlooking Climate, Wind, or Seismic Requirements
Different regions have different structural demands.
- Always take into account your climate zone, especially for exterior wall framing.
- Be aware of seismic, wind loading, and snow load requirements that may affect stud spacing, nailing patterns, and wall bracing.
EcoSmart™ Studs: Smarter Framing for Modern Builds
EcoSmart™ Studs are an innovative solution designed to meet the increasing demands of exterior wall framing. They deliver superior strength, insulation, and code compliance all in one.
Benefits of Thermally Broken Studs
EcoSmart™ Studs feature built-in thermal breaks that reduce energy loss through thermal bridging; a major cause of heat transfer in traditional wall framing.
Code-Ready and Energy Efficient
EcoSmart Studs are already aligned with upcoming code changes and energy standards:
- They are Energy Star® compliant and aligned with Zero Energy Ready Home (ZERH) program
- They’re ready for 2026 building codes, making them a future-proof investment
- Using EcoSmart Studs and the flash and fill insulation style helps simplify building a stronger, better insulated and sealed exterior wall
Insulation Value
EcoSmart studs have built in thermal breaks that serve several purposes
- Makes studs lighter, makes wall sections light and easier to lift
- Built in grab handles for moving wall sections. No wall straps needed
- Built in wire chases, less drilling needed
- Built in plumbing chases, less drilling needed
- Thermal breaks, higher R-value stud loses less energy through thermal bridging
- Exceeds the 2024 National Energy code requirement for exterior wall insulation.
- Meets the insulation requirements for the Energy Star program.
Strength and Structural Performance
Eco Smart Stud Wall with flash and fill insulation start at a 495 PLF rating with no extra nailing needed. The 2 lb closed cell spray foam insulation glues all the components together.
That is equivalent to a 3/12 nailing pattern required in many high wind and seismic areas of the country.
Many areas of the country this exceeds building code requirements.
Airtight & Vapor-Sealed Wall System
EcoSmart Studs paired with 2 lb. closed-cell spray foam insulation offer a complete air and vapor control solution:
- Air sealing: The spray foam fills all gaps, stopping air infiltration
- Vapor barrier: Just 1 inch of foam provides the required vapor seal
- Moisture control: The wall system is designed to dry both inward and outward, maintaining a healthy envelope
FAQs About Wall Studs & Framing
Q: How do I find studs in an existing wall?
There are several reliable ways to locate wall studs:
- Use a stud finder for the most accurate results.
- Tap the wall and listen for solid vs. hollow sounds.
- Use a strong magnet to detect nails or screws in the drywall.
- Measure in 16- or 24-inch increments from a corner or electrical outlet—most studs are spaced this way.
Q: What’s the best type of wall stud for energy efficiency?
EcoSmart™ Studs are among the best options for energy efficiency.
They offer:
- Built-in thermal breaks to reduce energy loss
- Compatibility with flash-and-fill spray foam insulation
- Compliance with Energy Star and upcoming 2026 energy codes
Q: Can I build a load-bearing wall myself?
Yes, you can build a load-bearing wall, but it must be done correctly.
- Follow local building codes
- Use the right materials and fasteners
Most importantly, have the design reviewed or inspected by a certified building inspector or structural engineer to ensure safety and code compliance.
Join the EcoSmart™ Priority List
With rising energy code requirements and growing demand for sustainable construction, it’s time to rethink traditional framing. Join the EcoSmart™ Priority List to get updates, product availability, and exclusive early access.